TYPOGRAPHY AND HYPERTEXTUALITY - Final Project (Kinetic Typography)
25 October, 2017 - 8 November, 2017 (Week 11 - Week 13)
Jesslyn Fabryando (0332213)
Typography & Hypertextuality
Final project Kinetic Typography
Lecture 11: Briefing on Final Project (Kinetic Typography)
15 November, 2017 (Week 11)
On this week 11, there is no lecture. We were just given the brief to start our final project which is designing a poster using our own font that we design on project 2 before (Kinetic Typography). There is no lecture given rather we were just shown examples of the previous batch's font that they designed. The poster should talk about the font that we designed.
Lecture 12: Text/ Indicating Paragraphs
22 November, 2017 (Week 12)
On this week 12, we had a lecture about text/ indicating paragraphs. Our lecturer started the lecture by explaining a pilcrow as one of the options in indicating paragraphs.
 |
| Fig. 1. Example of pilcrow in a paragraph |
Line space vs leading:
Line spacing and leading are different meaning. Line spacing is the space from ascender to descender wherein Leading is the space between 2 paragraph.
 |
| Fig. 2. Line space vs leading |
Indent is type of alignment where the position starts further from the margin than the main part of the text. We were given an important information whenever we use indent wherein we should make the paragraph in left justified text. So that there is a clear definition. No ragging. Last but not the least is that do not use indent with letter spacing.
 |
Fig. 3. The display of the standard indentation
The display's indent is the same size of the line spacing or the same as the point size of your text |
Extended paragraph usually creates unusually wide column text.
 |
| Fig. 4. The display of extended paragraphs |
Text/ Widows and Orphans:
In traditional typesetting (the kind that still endures among conscientious commercial publishers), there are two unpardonable gaffes—widows and orphans. Designers (specifically those that deal with large amounts of text in websites or books on online magazines or printed magazines, news papers or online journals) must take great care to avoid the occurrence of the the above mentioned.
A
widow is a short line of type left alone at the end of a column of text.
An
orphan is a short line of type left alone at the start of new column.
 |
| Fig. 5. The display of widows and orphans |
Text/ Highlighting Text:
This highlighting method is for the purpose of differentiating from the rest of the text. Usually when they highlight a text, they might reduce the size by 0.5 from the whole size of the body and disrupt the rhythm so that it will look harmony in the visual look of text. Number can also be reduced by 0.5 because numbers is in cap height.
 |
| Fig. 6. Display of reducing the size by 0.5 to match the x-height of the typeface |
When highlighting text by placing a field of colour at the back of the text, maintaining the left reading axis (right example) of the text ensures readability is at its best.
We were also told my our lecturer that in a webpage if we are designing and we want to highlight a text, it is ok that we highlight any color we want just need to make sure it is readable. However, if it is printed body text, we were advised to use only black/ CMYK color. CMYK is called an offset color. Aside from the offset color we can use also pentanes color.
 |
| Fig. 7. Color that should be used when printing |
 |
| Fig. 7.1. Examples of highlighting a text |
Sometimes it is necessary to place certain typographic elements outside the left margin of a colomn of type (extending as opposed to indenting) to maintain a strong reading axis.
 |
| Fig. 8. Examples of the alignment when making use of the bullet points |
Text/ Headline within Text: A head indicates a clear break between the topics within a section.
 |
| Fig. 9. Examples of different headlines |
 |
| Fig. 9.1. Examples of different headlines |
Cross Alignment:
 |
| Fig. 10. Display of cross alignment |
Lecture 13: No Lecture
29 November, 2017 (Week 13)
On this week 13, we were finalizing out kinetic typography poster. There is no lecture given rather we were given time until 11 a.m. to finish our poster as well as the animation.
INSTRUCTION
Final Project : Kinetic Typography
WORK PROCESSES:
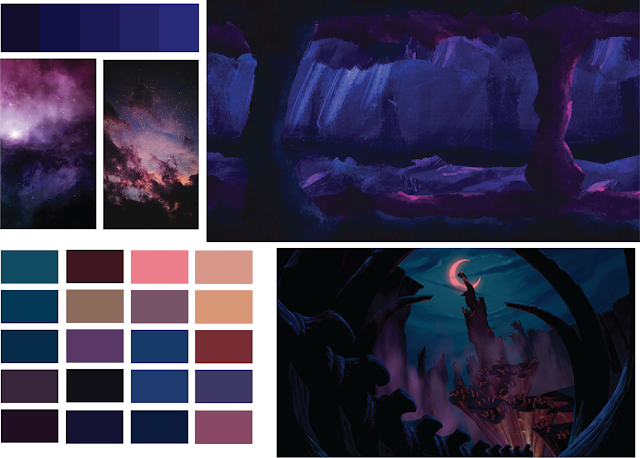
I began the project by doing a research of what Garamond typeface poster looks like as well as Britannic typeface poster looks like. I found a lot of Garamond poster which has this combination color of black and white as well as yellow and white.
 |
| Fig.1. References of the different poster |
 |
| Fig. 2. Sketches of different poster layout |
From the sketches that I made, I came up with a combination of all the sketches that I have made.
 |
| Fig. 3. First attempt of designing my font poster |
 |
| Fig. 3. Second attempt of designing my font poster |
 |
| Fig. 3. Third attempt of designing my font poster |
 |
| Fig. 4. Forth attempt of designing my font poster - (Final Poster) |
Fig. 5. First attempt of my animated poster
Fig. 5.1. Second attempt of my animated poster
 |
| Fig. 5.2. Third attempt of my animated poster |
 |
| Fig. 5.3. Thumbnails of the animated kinetic poster |
FEEDBACK:
Week 11 - November 15, 2017
No feedback is given because this week is only introducing about the final project as well as finalizing out font design.
Week 12 - November 22, 2017
Poster designing: When I am working with a poster, I need to take some of the letters that are significant to show the characteristic of the characters. Also, when we design something take it one at a time, see how the placement flows and are connected.
Week 13 - November 29, 2017
My poster is generally ok. My composition is good and there is also a movement in the letter. Since, my letter has a hole in it and I added some letters to fill the gap, I was asked to adjust the letter size. For my typeface name I was asked also to adjust the position to the left a bit because it’s nearly in the edge. My second feedback when I showed Mr. Vinod, he asked me why there is a need for me to have the gradient color, it is not necessary. My third feedback is my animation. I have problem with my animation wherein I animated too slow, I was advised by Mr. Shamsul and Mr. Vinod to make the letter appear faster and also for the background I was asked to animate it like flickering.
REFLECTIONS:
1. Experience
- On the eleventh week, I am having a hard time researching about my typeface as my references especially Britannic Bold typeface. I didn't get enough information and the history of it. This results me to consume a lot of time and didn't get to start my sketches and no results of my research.
- On the twelfth week, I am stuck with my poster, I don't know how to make it interesting until I asked some feedback from my lecturer, that's the time I got some idea and able to rework my poster design.
- On the thirteenth week, I was a bit ok, I am not rushing or cramping because I make sure my poster has a motion and has a good composition in order to avoid lots of changes. After given a feedback from my lecturer I only make a small adjustment. However, I am stress because I am having a hard time using adobe animate to animate my poster.
2. Observation
- On the eleventh week, I observe that I should spend more time on the research if I couldn't find it. Go to the library who knows there is information about the typeface that I am searching for. Don't rely everything in the Internet.
- On the twelfth week, I observe that I need to get some feedback from people so that I have the inspiration and idea to make my work even more interesting. Aside from that if we will do some assignments we should do it one at a time so that the outcome will be maximal.
- On the thirteenth week, I observe that if I make a good composition and the position of my letters, I will not deal with a lot of changes. I can see a good composition makes the work interesting and pleasant to the eyes. Aside from that every time we make a poster, I realize that overtime I was asked to animate, my animation turns out to be so slow and looks normal and boring, so I need to make sure later on with another project the animation should be interesting and not boring.
3. Findings
- On the eleventh week, For every tasks that I do, I need to start by having a research, sketches and references for me to have idea.
- On the twelfth week, For the things that I do, I shouldn't be afraid to ask people's opinion and feedback because if I will just keep quiet, I cannot improve and don't even know how to make it better.
- On the thirteenth week, For every tasks that I do, I realize that composition is so important because once the composition is bad and it's too noisy the rest of the work will not look great. The most important thing that we should always keep in mind is that keep every work that we do simple with a good composition and good placement of things.
FURTHER READINGS (Week 11 - Week 13)


Comments
Post a Comment