Week 9 - Week 11 (Project 1: Part 2) - Surrealistic
DIGITAL IMAGING AND VISUALISATION - Project 1: Part 2 - Surrealistic
Lecture/ Tutorial 9 & 11: Surrealistic
Jesslyn Fabryando - 0332213
Digital Imaging & Visualisation
On the ninth week, we are starting our project 1: part 2 of making surrealistic image. This time we are using our own images to create it Furthermore we will animate it zoom in/ zoom out and a little bit of movement. The software that we will be using is Adobe Photoshop for editing, Adobe After Effect for animating using puppet pin tool as well as the transform setting by adjusting the position and the scale. The submission should be in GIF and can be sent to WhatsApp therefor the file should be compressed not exceeding 65MB because WhatsApp cannot accept beyond 65MB.
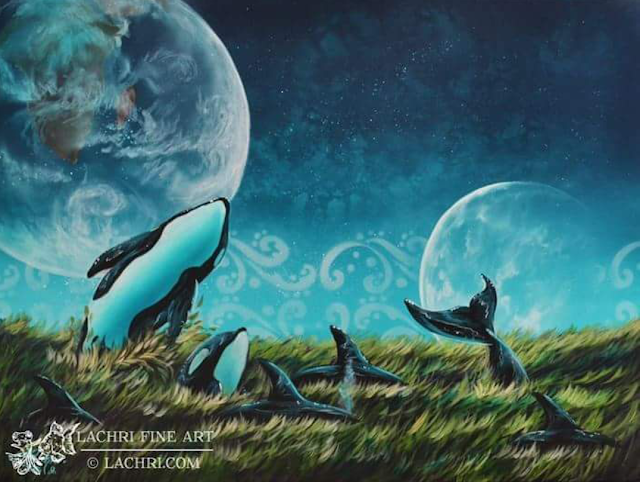
Mr. Hafiz told us to have the references base on a painting so that it will be easier. Below is my Surrealistic painting references by Lisa Lachri.
 |
| Fig.1. Surrealistic painting Reference by Lisa Lachri |
Below are some of the images that I took picture on my own and took it from google. These images are being manipulated in Adobe Photoshop Software.
 |
| Fig. 2. Picture taken from google |
 |
| Fig. 2.1. Own photograph |
I took some of the images from google which I have to edit completely to 60% so that it will be mine. For the background I took it from the google which then I edited by copy paste and make it overlapping to each other. I also adjust the blending modeling multiply, screen, lighten. I also made use of the blending option to make one of images will be lying on top of another image by dissolving the image at the same time. I also play with the opacity and the will.
 |
| Fig. 3. Night background that I took from google and I edit |
As for the earth I also edit completely where I keep on duplicating the layer and make it overlap. I also play with the adjustment. I added some clouds using my own photograph and use mask to hide the uncertain part.
 |
| Fig. 4. Adjusting the earth that I took from google |
For this surrealistic image that I am doing, I made use of the leaves that I took as the ocean water, I duplicate this leaves and change the blending mode to multiply, lighten and darken. Also, for the Beluga whale, I made use of the smudge tool, burn tool and blur tool. I also made use of clone stamp to fix parts of there whale tail. I also play with the color using brush paint it on top of the tail and change the blending mode option.
 |
| Fig. 5. Make an adjustment to the whale, tail of the whale and the leaves |
I play with the lighting where I create new layer and paint it using the brush. As I painted the layer I then use the blending mode tool which is multiply and color dodge. I use multiply for darkening the whole entire image and I use color dodge for adding some lighting to the entire image.
 |
| Fig. 6. First layer no blending mode is applied Second layer multiply blending mode is applied Third layer color dodge is applied |
 |
| Fig. 7. Final outcome of the surrealistic image |
 |
| Fig. 8. Final outcome of the surrealistic image - GIF |


Comments
Post a Comment